For this assignment we needed to make 5 of the same thing, focusing on repeatability. How can you assembly line a process? What tools can be used to help you repeat a process over and over again. The project had to be multi-processed, not just pressing print 5 copies on the laser cutter or 5D printer.
After much back and forth on what to make , I decided on wooden dice. I wanted to challenge myself to work with the power tools in the shop and a material that could not be as easily molded by hand, like wire. And there would certainly be many steps to their creation.
Dice have been used since before recorded history, and are one of our earliest gaming implements known to man. The oldest known dice date from 2800-2500 B.C.E and were excavated from an an archeological site in south-eastern Iran as part of a backgammon like game (Wikipedia). The precursors of dice were often marked animal bones with “magical properties” used to cast fortunes of the future. The mathematical connections were not attached to dice until the 16th century when the concepts of randomness and probability were conceived (Britannica ). Although there are many forms of dice nowadays, different shapes, loaded, etc. the typical 6 sides cube is labeled with numbers 1-6. And if you didn’t know, each face and its opposite always add up to 7!
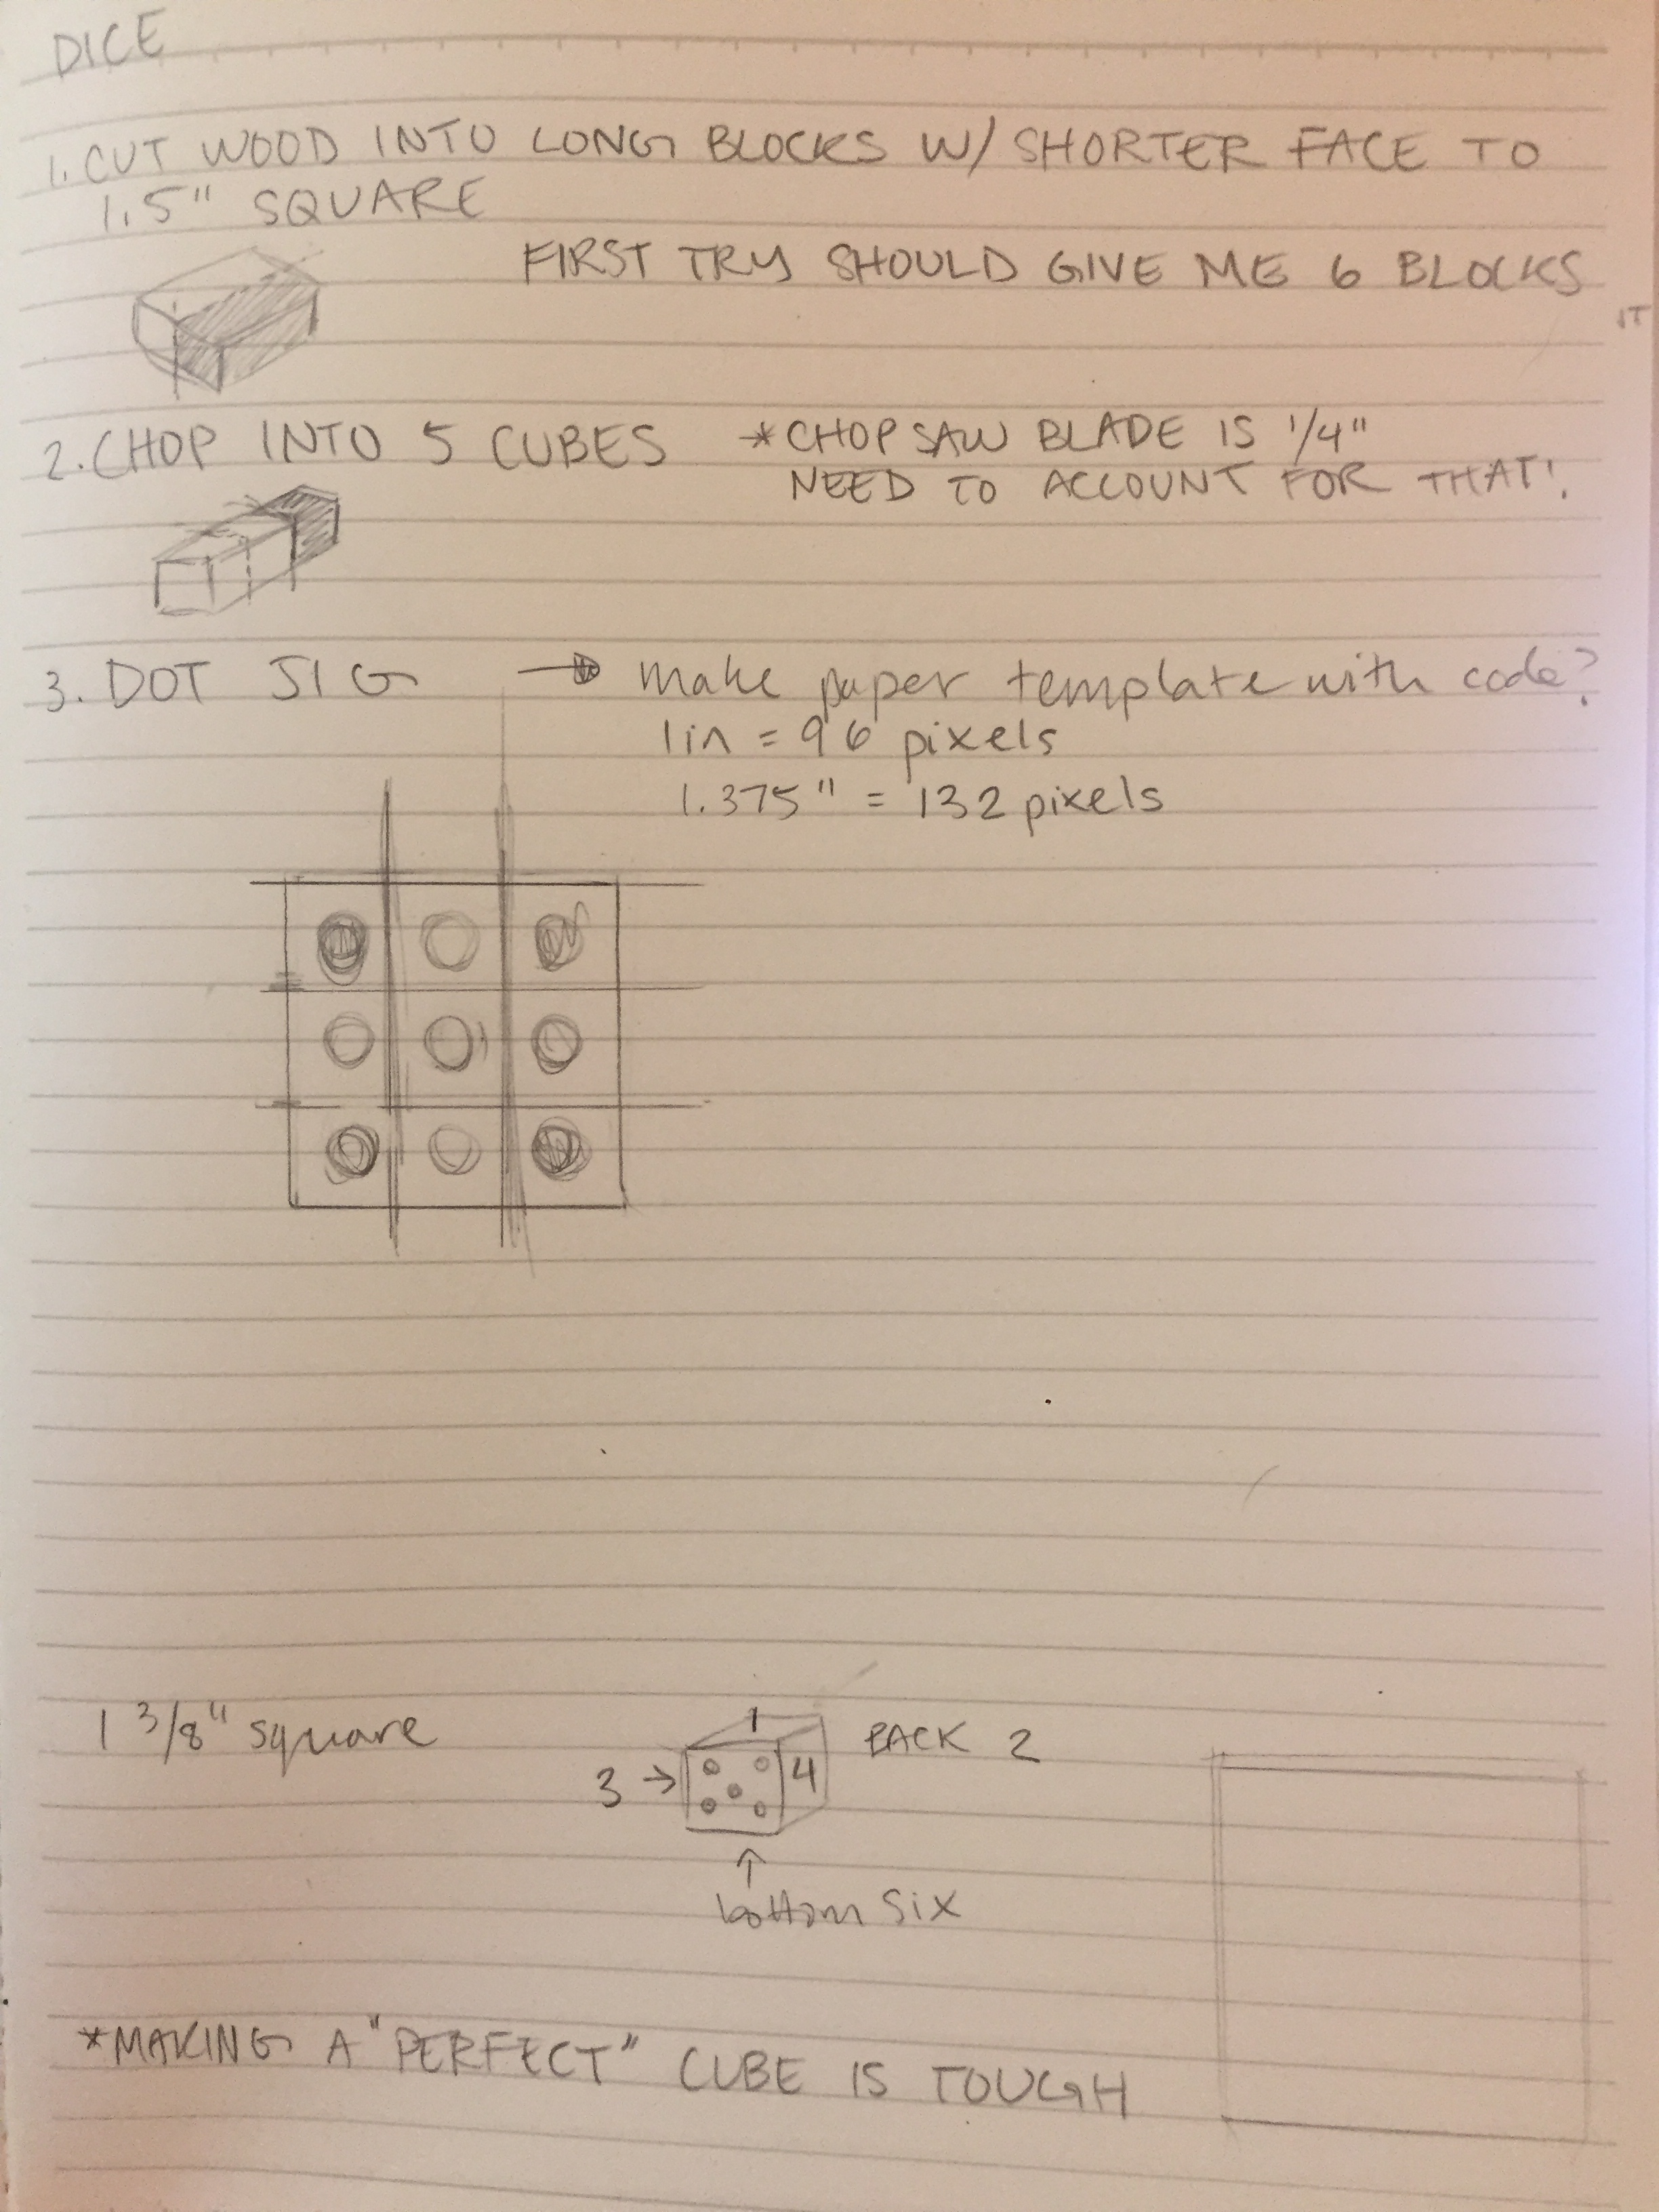
My plan:
I’ve set a guideline for myself: no purchasing of any material – only use scrap wood.
Obtain a longish piece of wood
Cut to a size so that one face is a perfect square
Chop into five cubes
Create a “stencil”/jig out of a copper plate I found on the junk shelf with 9 evenly spaced holes 3 x 3 (drilled with drill press). This will be my guide for where to place the dots on the face of the cube
Use a drill, or if possible a dremel with a circular head? (ask in shop) to create the dots. Ideally I would like them to look like dimples more than holes, which is why I’d like to know what tool could accomplish that.
As planned, I secured wood from the scrap pile! For a better aesthetic, I looked for solid pieces of wood instead of ply. Note: none of these scrap pieces were very long, which made my quest for precision even more difficult, because I barely had any room for error.
Sketching out my plan.
The first thing I did was figure out a good size to make the dice based on the pieces of wood I found. 1.5” square seemed to work. I started by cutting a board roughly in half lengthwise with the band saw. Ben already told us this wasn’t very accurate, so I left room in case I couldn’t make a straight line. Then I went totally power sander crazy. With no guidelines, I just kept sanding like YAY EVERYTHING IS SMOOTH. So I ended up with two very smooth but very wonky blocks. Alas, as most things are in creating, it doesn’t go perfectly the first time around.
I tried again, using penciled lines carefully measured. This allowed me to sand with a guideline instead of depleting material recklessly. The final square face would be 1 3/8” square.
Next, I needed to chop the long pieces into cubes. Since the band saw, is not very precise, I knew I should use the chop saw. I measured out my long pieces to be chopped with a fine pencil line separating each. John made me rethink this because the chop saw blade is 1/4”. Measuring each cube needed to account for this loss of material. John helped me cut five “equal” cubes.
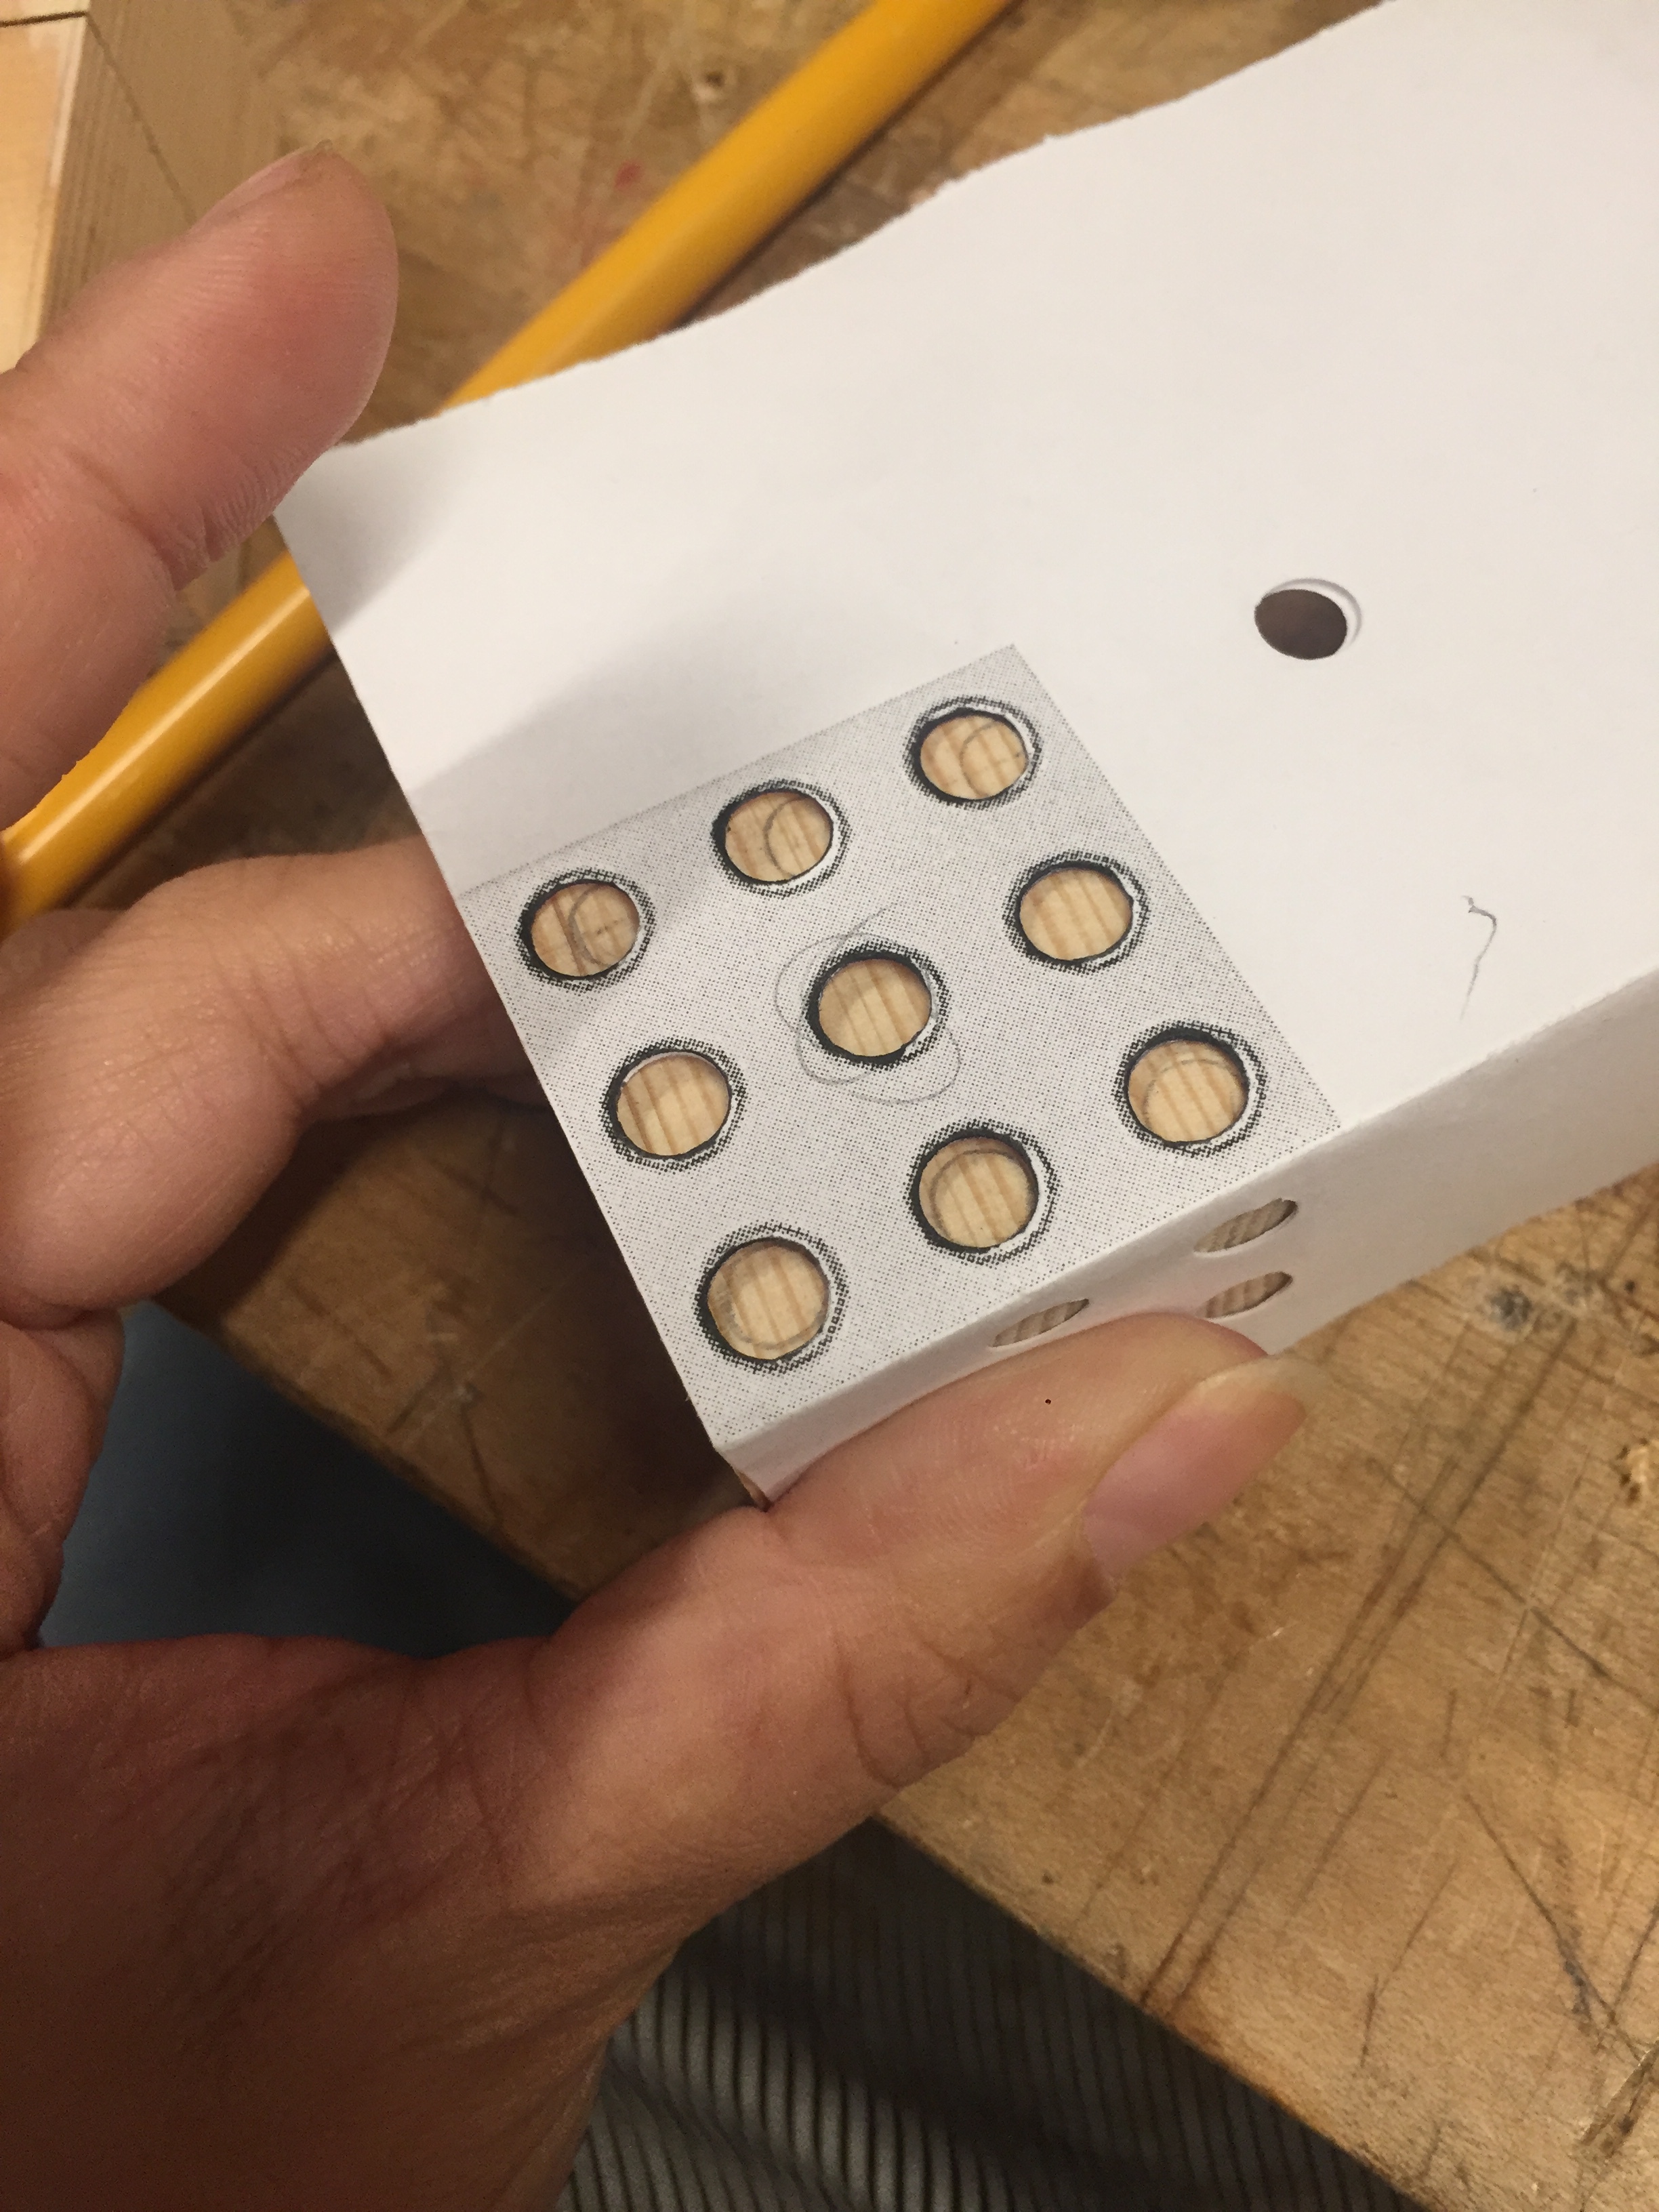
After this I wanted to make some sort of jig to place the dots perfectly on each face of the cube. I saw this as a good opportunity to use some things we were learning in ICM. I wrote a simple program to create 3 x 3 grid of 9 equally placed dots. From these nine, I could make all the different dice patterns.
It took me a white to figure out how to pt the dots on the cube. Aesthetically, I wanted them to be dimples more than holes. So I tried using a dremel with a stone bit. Although, I liked it (even when it burned the wood), I knew drilling each dot by hand would be difficult.
Drill press and mighty clamp.
Dot stencil ”jig” placed over each cube.
Drawn dots. Matched to make sure each opposite face add up to 7.
Rough dice, rough dots, rough table surface.
I opted for the drill press instead to create more exact holes. Ideally, my jig would be able to hold the cube solidly in place and in line with where ever a dot would need to be drilled, but since there are a few patterns, this potentially meant several jigs.
Ultimately, I used the clamps at the drill press as a sort of jig to hold dice position and my dot code as a paper stencil. For example, patterns 1, 3, and 5 all contain 1 dot in the center. I could leave the clamp in “same position” for all the centers of all 5 dice. HOWEVER, and it’s a big however. These are far from perfect cubes. While this would have worked in concept, it did not work in practice, and I had to move the clamp almost every drill to line up the dice in the proper position (using my stenciled holes drawn on each dice as a guide). 105 dots in total!
To finish up, I gave them a nice sand. In the future, I might paint the dots a nice brown (inspired by my accidental wood burning) and maybe wax them to bring out the grain.
FINAL THOUGHTS
Though far from perfect or precise, I am proud of what I made for this assignment. I chose dice for the opportunity to learn the power tools in the shop and work with wood. Two goals that I accomplished. I practice using the band saw, power sander, chop saw, and drill press. My big lesson learned is not to rush. Especially during dot making, I started getting frustrated it was taking so long. There are a few holes that frayed because of my impatience, and thus it doesn’t look as polished as if I just gave over a few extra seconds to do it right. I don’t know if I’d make dice again, but I know some good techniques to apply for other projects.
Now, let’s go play Yahtzee!


